Pages

Showing posts with label Cookies. Show all posts

Wednesday, November 23, 2016

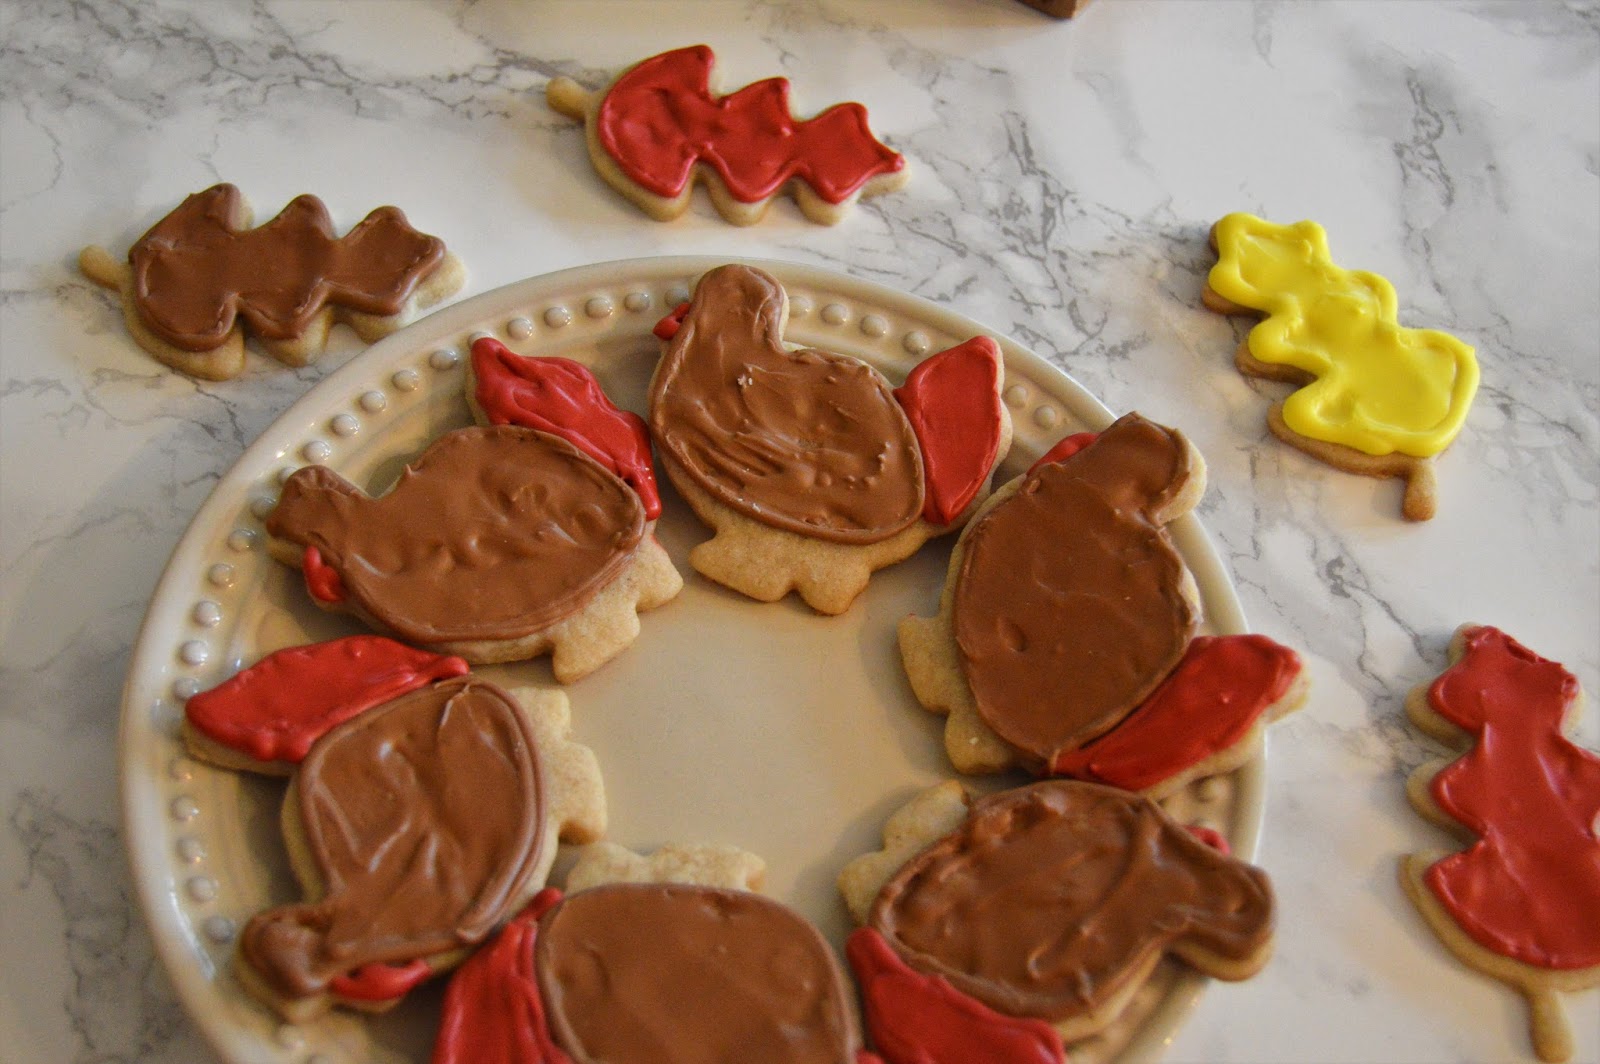
Happy Thanksgiving Cookies


So, if you didn't know Thanksgiving is tomorrow, TOMORROW!
For the last five or six years we have had Thanksgiving at our house, but this year we are having it at my Grammies. Not having so much preparation to do has really made it sneak up on me.
I wanted to do something quick and easy, yet festive, and I think these cookies are perfect for a last minute Thanksgiving treat.

For the Cookies:

3 Cups All-Purpose Flour
3/4 Cup Almond Meal
1 Teaspoon Baking Powder
1/2 Teaspoon Nutmeg
1/2 Teaspoon Cinnamon
2 Sticks Salted Butter
1 1/2 Cups Sugar
2 Large Eggs
1 1/2 Teaspoons Vanilla
1/2 Teaspoons Almond Extract

In a large bowl whisk together the flour, almond meal, baking powder, and spices.
In large mixing bowl beat room temperature butter until smooth. Add the sugar, and beat until fluffy, about four minutes.
Add the eggs one at a time to the butter mixture, beating well after adding each egg.
Beat in the vanilla and the almond extract.
Slowly add the flour mixture to the butter mixture, mixing at a low speed until the flour is completely combined.
Form the dough into two sections and refrigerate for an hour.
Preheat the over to 350f.
Roll out the cookie dough to 1/4 inch thickness, and cut out the forms. I used cookie cutters I got at Walmart that are made Wilton.
Place the cookies on a cookie sheet about a inch apart( these don't raise much) and bake for about six minutes or until the cookies are set. I really wanted the cookies to be a little bit chewy so I didn't let them get golden.
Place cookies on a cooling rack, and cool completely before decorating.

Royal Icing

5 Egg Whites
1/2 Teaspoon Vanilla
4 Cups Powdered Sugar
Food coloring of your choice

In a large bowl, whisk together the egg whites and vanilla until frothy.
Add the powdered sugar a little at a time, whisking in after each addition.
If you want your icing to be really white you can add a couple of drops of lemon juice, but I skipped this because I am coloring my icing.
Now its time to ice!
I outline the shape I want the icing to be, let it set for a minute or so, and then fill it in with the same color.


The cookie, and the royal icing recipes originally come from The Nerdy Nummies cook book my lovely sister gave me for my birthday.
I had a lot of fun making these cookie, I don't feel like my  icing job came out that well but oh well. They taste good and look cute, so that's all that matters.
I hope you all have a wonderful Thanksgiving!

Friday, April 29, 2016

Spring Chocolate Chip Coconut Cookies

Happy Friday!

I am very happy to be writing this post today because I wasn't positive I would get the chance this week, but here I am. 
I have been trying to find springy recipes lately and haven't been finding quite as many as I would like so, when all else fails improvise! So I come up with this twist on the well loved chocolate chip cookie.


What You Need: 

1 Cup Butter, Softened 
3/4 Cup Sugar 
3/4 Cup Brow Sugar 
1 Teaspoon Almond Extract
2 Large Eggs
2 1/4 Cups All-Purpose Flour
1Teaspoon Baking Soda
2 Packages Nestle Toll House Springtime Morsels, divided 
1 3/4 Cups Coconut flakes.


 What To Do:

Preheat oven to 350f
Step1#
In a large mixing bowl cream together the white sugar, the brown sugar and the butter.
Step2#
Add the almond extract and the 2 large eggs to the butter and sugar mixture. beating on a medium speed until fluffy.
Step3#
In a medium sized bowl combine the flour and the baking soda and whisk together. 
Step4#
Add the flour mixture to the sugar mixture, and mix on a low speed until a soft dough is formed.
Step5#
Add all the coconut and a little more than half of the morsels to the cookie dough and mix at a low speed.
Step6#
Drop the cookie dough by rounded tablespoon onto a cookie sheet. Bake for 8-12 minutes, or until slightly golden around the edges.
Step7#
While the cookie are still warm from the oven, top with the remaining morsels, and place and a cooling rack.

I hope you all have a wonderful weekend!
Anna.


Friday, April 22, 2016

Chocolate Crinkle Cookies

HI Guys!
Is it just me or did this week go by really fast?
It seems like it was just Monday, and now here it is Friday again. 
Chocolate Crinkle cookies. I know their not very springy, but I thought they looked like they would be fun. These cookies are VERY chocolatey, I even had a couple of people ask if they had coffee in them. I have to be honest and say that I'm not that big on a chocolate fan, which I think I may have said this before. So these cookie aren't exactly my cup of tea, everybody else loved them, and that's what I was going for. These are almost have a biscuit like texture, and they have a very dark chocolate flavor. 


 What You Need:

1/2 Cup (1 stick) Butter,
1 Cup Light Brown Sugar,
2 Large Eggs,
1 1/4 Cup All-Purpose flour,
3/4 Cup Unsweetened Cocoa Powder,
1 1/2 Teaspoon Baking Powder, 
1/2 Cup Powdered Sugar, 

What To Do: 

Step1#
Preheat you're oven to 350f
Line a cookie sheet with parchment paper.
Step 2# 
In a large mixing bowl, cream together the butter and the brown sugar, until fluffy. Then and the eggs.
Step 3# 
In a medium sized bowl, whisk together the flour, cocoa powder and the baking powder. 
Step 4#
Add the flour mixture to the brown sugar mixture, and mix on a medium speed until a soft dough forms.
Step 5#
Scoop out about a tablespoon of the dough, and roll it into a ball. Then roll each ball in the powdered sugar until evenly coated. Place the cookie about 1 1/2 inches apart on the lined baking sheet.
Step 6#
Bake until the cookies are set and the tops are cracked, about 10-13 minutes. Cool the cookie on a wire baking rack until completely cool.

Voila! 
I had a lot of fun making these, and they were a big hit, so I think I will be making them again.
Have you ever made crinkle cookies before?
I hope you all have a wonderful weekend!
Anna.

Saturday, March 26, 2016

Easter Sugar Cookies

 First, I should admit my cookie decorating skills could improve. But I still had fun making these, and they taste really nice, and that's whats important, right.. Secondly, I don't really go all out for Easter with the eggs and the bunny, yes they are cute and fun, but that's not what Easters really about is it.
Any ways, the real reason for making these cookies is that I found these really cute cookie cutters at TJ Max, and I thought this was a good excuse to use them. These cookies are so simple and yummy, you can go crazy decorating them.

What You Need:

 1 Cup softened butter,
1 C powdered sugar,
1 egg,
1-1/2 teaspoons Vanilla,
2-1/2 Cups all-purpose flour,

What To Do:

 Preheat Oven at 350.
In a large mixing bowl cream together the butter and the powdered sugar until fluffyish. Then add the egg, vanilla, and the almond extract. Add the flour and mix at a medium speed until a soft dough is formed. I would highly recommend butting the dough in the fridge for about an hour, but if you're inpatient like me, you can add a little extra flour to the dough.


Roll out the dough on a lightly floured counter top, roll the dough 1/8 of an inch thick.
Then with lightly floured cookie cutters, cut out the cookie.
If you are using the same bunny cutter I am be sure to cut the same amount of tales, I had a couple taleless bunnies. oops..
Bake for 8-12 minutes, until the cookies are firm in the center and the edges are a slightly golden.


Decorate with you're choice of icing or frosting.
I chose to use pastels, because they make me think of spring.
So make sure you use plenty of sprinkles and icing. And have fun.


                              The Bunnies are my favorite!


 What is you favorite thing to make for Easter?
I hope you all have a blessed Easter.
Anna.